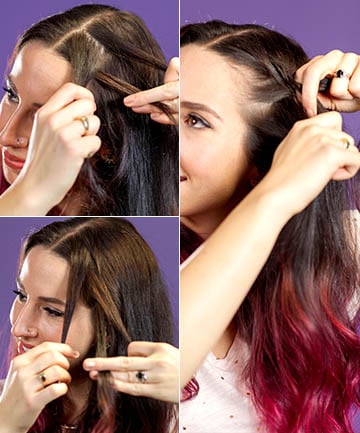
You are going to repeat this same braiding pattern with the three strands, but will be adding a small amount of hair from both sides of the braid to add fullness and continue the braid going down the length of your head.
With the three strands starting to form a braid, take a small amount of hair from the front side (near your temple) and add it to section one of the hair, braiding it under and replacing the middle strand of hair. Take a small amount of hair from the back side (nearest your crown) and add it to section three, braiding it under and replacing the middle strand of hair. Continue this pattern as you move down the length of your head. When you get to the lengths of the hair and there is no more hair to take from either side, continue braiding without adding any hair, making sure to keep weaving the hair under the strands instead of over.
Photo 6/9
How to Dutch Braid: Step 5
Make sure to smooth out the hair as you add it to the Dutch braid to avoid bumps and large fly-aways (your rat tail comb and hair spray can help if you encounter these.) Try to keep the pieces of hair similar in size as you add them to the braid to keep it looking uniform throughout. If you feel your Dutch braid drifting too much toward your ear or to the back of your head, pull the strands on the opposite side taut to counterbalance the braid and re-center it.
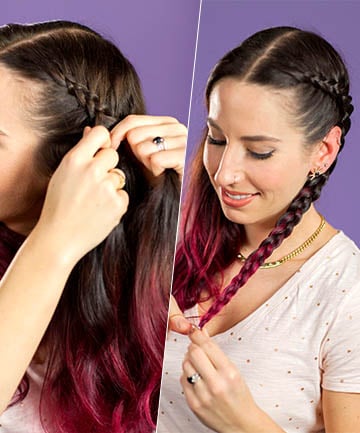
Continue the braid through the length of your hair and add a rubber band about one inch from the bottom. You are now ready to do Dutch braid No. 2.
Photo 7/9
How to Dutch Braid: Step 6
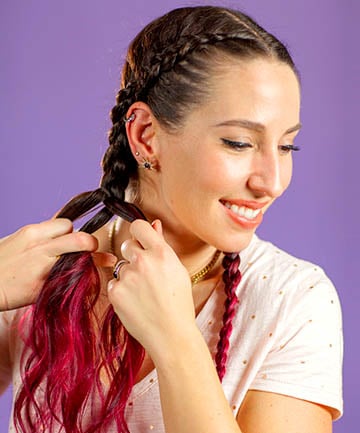
Remove the clip from the opposite side of your head and add dry shampoo to prep the hair. Repeat Dutch braid steps three through five, making sure to check the mirror periodically for symmetry. Add a rubber band to the end of the hair, leaving about an inch free at the bottom.
Photo 8/9
How to Dutch Braid: Step 7
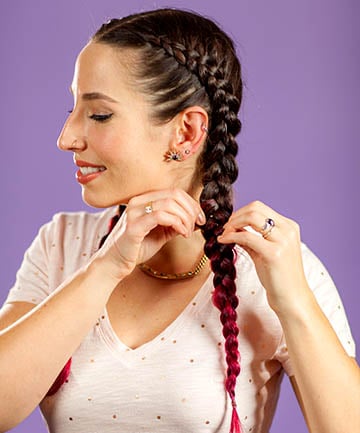
If you have fine hair like I do, you'll want to add more bulk to your Dutch braids. While the dry shampoo definitely helps on that front, pancaking your braids is another way to add volume. Gently pull apart each section of your Dutch braid with your thumbs and pointer fingers. This spreads out the braid, making it look fuller. It also gives your Dutch braids a slightly undone look, so they don't look too polished and perfect. Remember to maintain symmetry between the right and left braids.
Photo 9/9
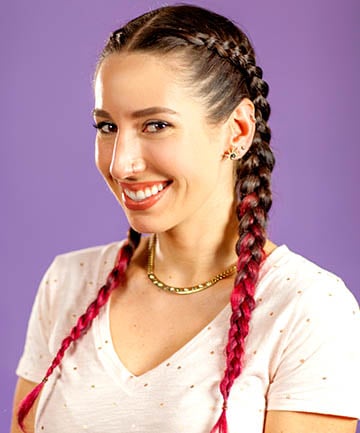
How to Dutch Braid: Final Look
To finish your Dutch braids, mist all over with a medium-hold hairspray. You are now ready for anything in your Kardashian-esque double Dutch braids, which will last you all day and possibly into the next day as well. And what's even better than that? The glorious waves to follow when you take them out. Congratulations, you've now learned how to do the double Dutch braid.