Photo 1/9
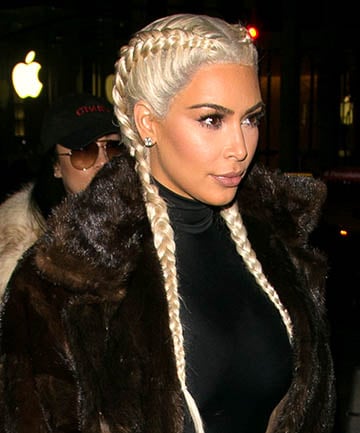
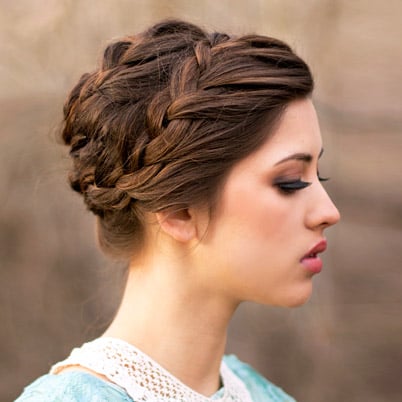
Dutch braids, a cousin of the French braid, have been around forever. They are the perfect hairstyle when you want your hair out of your face, while looking timeless and a bit edgy. Double Dutch braids, also known as boxer braids, have been making a major impact lately, thanks the Kardashian clan. Khloe, Kim and Kylie are often spotted rocking the dual-braided 'do. A Dutch Braid is basically an inverted French Braid; the three strands of hair are woven under each other instead of over -- resulting in the braid sitting on top of the hair instead of being woven into it. These versatile braids look ultra-chic in the gym, at brunch, or on the red carpet.
Think you can't do a Dutch braid on yourself? Our easy-to-follow double Dutch braid tutorial will show you how to Dutch braid in eight easy steps.
Image via Getty
Photo 2/9
How to Dutch Braid: Step 1
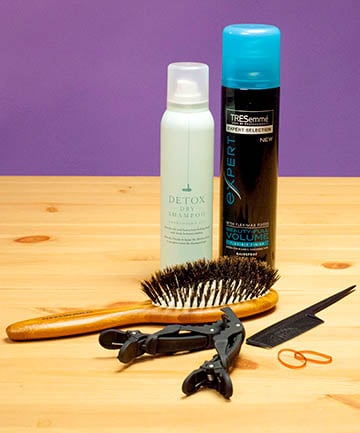
•A mirror (obviously) as well as a hand mirror so you can check the back of your head
•A rat tail comb to part your hair
•A natural bristle brush to tame fly-aways
•Hair clips
•Non-stick elastics like Goody Ouchless Polyband Elastics, $2.99
•Dry texture spray or dry shampoo like Drybar Detox Dry Shampoo, $23, to give your braids body
•Hairspray like Tresemme Beauty-Full Volume Hairspray, $4.99. to keep your braids in place
Now that you've got all your materials on-hand, you're ready to Dutch braid.
Photo 3/9
How to Dutch Braid: Step 2
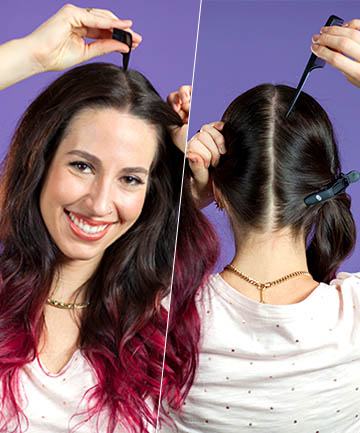
Apply dry shampoo to the loose strands of hair, making sure to get the product into the roots. Fluff throughout for maximum body. You are now ready to start your first Dutch braid.
Photo 4/9
How to Dutch Braid: Step 3
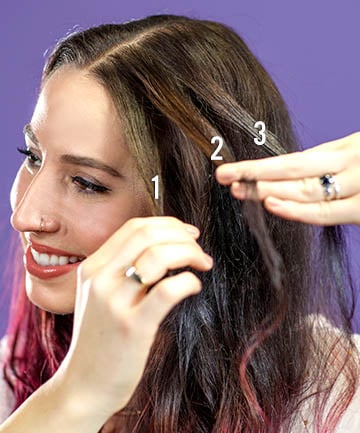
Photo 5/9
How to Dutch Braid: Step 4
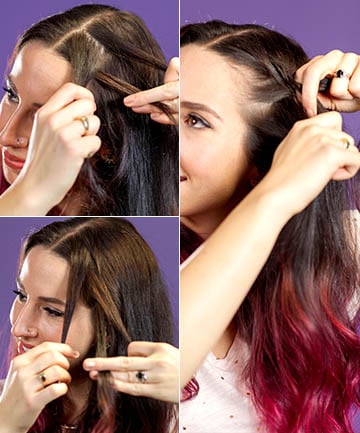
With the three strands starting to form a braid, take a small amount of hair from the front side (near your temple) and add it to section one of the hair, braiding it under and replacing the middle strand of hair. Take a small amount of hair from the back side (nearest your crown) and add it to section three, braiding it under and replacing the middle strand of hair. Continue this pattern as you move down the length of your head. When you get to the lengths of the hair and there is no more hair to take from either side, continue braiding without adding any hair, making sure to keep weaving the hair under the strands instead of over.