All About Obagi
Obagi Clinical has been around for the last three decades, but the name may not be familiar. That's because the brand has mainly been used in professional settings. A few years ago, it created a lineup of clinical-forward products that you can buy over the counter at places like DermStore and Target.
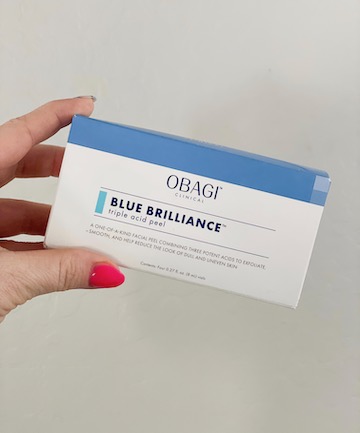
I won't go on and on, but I will tell you its products are legit. Including one of the brand's more recent launches, the aforementioned peel. As the name implies, this clinical-esque formulation contains three key acids: salicylic (BHA) and lactic and glycolic (AHAs). The goal is to make pores look smaller, brighten dull skin and create a smoother, softer complexion.
You get four treatments for $145, which amounts to $36.25 per treatment. Which is way less than you'd pay to have a similar topical-style peel in a professional setting.
Image courtesy Wendy Rose Gould
Let's Talk About My Skin Before

Like I mentioned, I am pretty good about my skin care routine so my skin is generally in decent shape. I do have a larger-than-average pore size (a verifiable fact thanks to a very informative skin scan I had courtesy of PCA Skin), however. So I tend to be extra dry, dull and flaky in the winter.
Image courtesy Wendy Rose Gould
The Experience

I love a good presentation and the brand didn't disappoint with a quartet of very professional-looking small vials filled with a pale blue liquid.
Before using, I cleansed my face, gently patted it dry and waited a couple more minutes to allow my skin to completely dry. (Pro tip: Water deactivates peels.) Next, I dispensed about half the liquid on a cotton round and applied it in a gentle sweeping motion across one half of my face. (Another pro tip: Using a cotton round, ball or pad will allow for more even application.) Then I repeated the process with the remaining half of the liquid.
Image courtesy Wendy Rose Gould
That Tingling Sensation

The peel definitely created some tingling, which got pretty intense about three minutes in (nothing unbearable though) before tapering off greatly after five minutes. The feeling was very similar to pro-level peels I've had done in clinical settings so I knew good things were happening.
The instructions say to wait for 10 minutes, which I did. Then I used a gentle hydrating cleanser to rinse the mask away. (I'm currently fangirling over Kiramoon's Silkie Rinse, $28.) Although the mask dries down completely and doesn't leave a film like some products do, you still need to remove it after 10 minutes.
Image courtesy Wendy Rose Gould
Real Results

Visually, the difference wasn't super extreme. I could immediately tell that my skin felt softer and smoother, though. Also, after examining the before and after images side by side, I could see a very clear difference in pore size and overall brilliance.
I was also super impressed that there was hardly any redness after using the mask. (This after picture was taken immediately after washing my face.) I have used "gentler" products that forced me to literally cancel dinner plans, but this one was strong enough to deliver on its promises without turning me beet red.
Image courtesy Wendy Rose Gould