GET FREE SAMPLES

sign up for our newsletter to get free sample alerts

I Got My Eyelashes Lifted, Here's What Happened

This treatment promises bat-worthy lashes, sans eyelash curler and mascara -- but does it work? One editor investigated
Photo 3/8
The Lash Lift Process: Part 1
On Courtney's orders, I washed my lashes thoroughly with an oil-free makeup remover. Then, I got to kick back and close my eyes for about 45 minutes, while Courtney worked her magic.

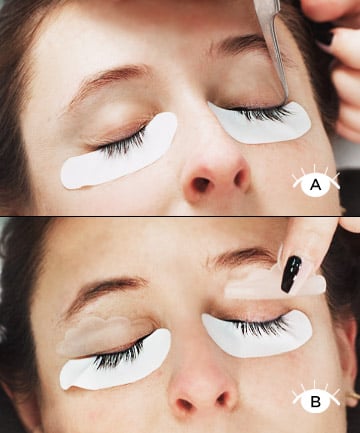
She started by applying a gel pad under my eye with a skin-safe adhesive to protect my lower lashes. I'll admit, this felt a little weird, but it wasn't uncomfortable. Then, she applied the same adhesive to my top lids, which felt warm and tingly (think: a menthol-like sensation), which felt strange, but didn't freak me out.

Next, Courtney adhered a silicone shield to my upper lid. This shield is essentially the mold for your lash curl. There are several sizes, and your technician will pick the one that's best for your lashes. For me, Courtney selected the largest shield, which would produce the most dramatic results. (Go big or go home, right?) I should mention that the lash lift process is a bit different from a lash perm. A lash perm involves a sticky cotton curling rod.


Photo 4/8
The Lash Lift Process: Part 2
Then, she brushed my lashes back over the shield and treated them with the lifting cream, which needed to sit for about 10 minutes (longer or shorter depending on how soft or course the lashes are). The lifting cream didn't feel like anything, but its strong old-school-perm scent gave me '90s flashbacks.

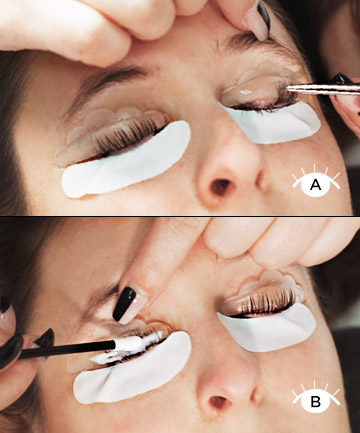
After applying the lifting cream, she locked the curl in place with a setting lotion, which required another five to 10 minutes of downtime (which I was more than happy to fill by chatting about terrible reality shows). Then she removed the solution with what looked like a lip gloss applicator.

Photo 5/8
The Lash Lift Process: The Tint
Because the tips of my eyelashes are blonde (aka nearly transparent), Courtney decided to tint my lashes as well. This isn't officially part of the lash lift process, but these two treatments are often done in tandem. And if you have blonde or partially blonde lashes like myself, I'd recommend adding a tint to get the most out of your lift.

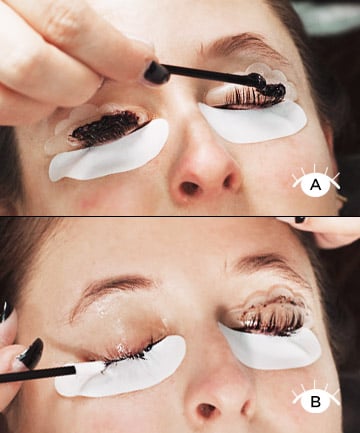
To finish up, she applied oil, which helped her remove the shields, while conditioning my eyelashes, and then sent me to the bathroom with some oil to remove any lingering adhesive.

Photo 6/8
The Upkeep
For the first 24 hours following my lift, I wasn't allowed to get my lashes wet, which meant I couldn't shower (a great way to justify skipping my workout). I also had to avoid snoozing face-down -- a real challenge for this stomach-sleeper. But I was relieved to hear that after the first day, I didn't need to go out of my way to protect my now perfectly curled lashes. I could wash my eyes with my cleanser of choice and sleep in whatever position I wanted.

Photo 7/8
The Results
After a fitful sleep on my back -- during which nightmares about accidentally destroying my eyelashes intermingled with perm-solution-laced reveries of middle school -- I woke up and rushed to the mirror.

The results were everything I'd hoped for. Without a lick of mascara and sans eyelash curler, my lashes looked their longest, fullest and perkiest ever. I could confidently leave the house without eye makeup (which I've taken advantage of a lot in the weeks following the treatment), or I could give my lashes a falsies effect with mascara.


BY MARY SQUILLACE | OCT 4, 2016 | SHARES
VIEW COMMENTS
Full Site | Terms & Conditions | Privacy Policy
TotalBeauty is a property of Evolve Media Holdings, LLC. © 2024 All Rights Reserved. | Affiliate Disclosure: Evolve Media Holdings, LLC, and its owned and operated subsidiaries may receive a small commission from the proceeds of any product(s) sold through affiliate and direct partner links.