Thanks to years of habitual SPF application — even at times when it caused others to look at me like I was a weirdo for slathering product on like clockwork — and a skin care regimen that I rarely stray from, my skin is pretty damn good. Especially given my ultra-fair complexion and especially considering I live in Phoenix where the sun shines brightly 299 days out of the year.
That said, I admittedly am forever on the quest for even better skin and I've been really curious about trying the Clear + Brilliant facial after seeing the results on celebrities and other skin care junkies. So in early November — just in time for the upcoming holidays — I ventured to VanDyke Aesthetics in Scottsdale, Arizona to finally try the buzzy laser treatment myself. My experience was amazing and my skin is glowy AF as I type this — and I'm eager to tell you all about it.
Image courtesy Wendy Gould
About Clear + Brilliant
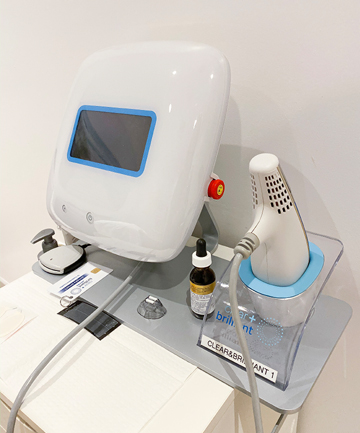
In short, Clear + Brilliant is a skin resurfacing treatment that uses pulsated, fractional lasers in order to get the job done. It's often called "baby Fraxel" because it uses the same fractional laser technology, just at a reduced intensity. That means you reap many of the same benefits but with reduced downtime (as in a day or two tops, versus an entire week).
As the name implies, Clear + Brilliant helps improve your skin's overall texture, tone, and clarity. It does so by sloughing off the superficial layers of skin to reveal the fresh skin underneath. Depending on your goals, you can opt for anywhere from one to six treatments (spaced out about a month each). You'll need more treatments if your goal is to really target hyperpigmentation and more severe texture issues, and less if your MO is simple skin maintenance. For instance, a lot of celebs (or everyday folks) will get Clear + Brilliant about a week before a big event for insane skin. The cost varies per treatment, but on average you can expect to pay $200 to $600 per.
Image courtesy Wendy Gould
The In-Office Experience

You'll first need a consultation to ensure you're a candidate for Clear + Brilliant. Some facilities do this in-person a few days before or the day-of, or even via phone call if you're an existing patient.
For the actual treatment, you'll want to carve out about 90 minutes from your day. The treatment itself doesn't take that long, but your practitioner will apply a topical numbing cream that needs to permeate for a good 30 minutes before wielding the laser. If you haven't experienced a numbing cream before, it essentially just makes your entire face feel numb for a couple hours (similar to how novocaine feels before you get a tooth filling, only zero shots involved).
Once the numbing cream has set in, it's time to laser. The feeling is a similar to the prickly sensation you experience when your hand falls asleep, only the sensation passes quickly as the laser glides across your face. I personally wouldn't say it hurts, and others have reported that Clear + Brilliant wasn't painful for them, either. I'd call it mildly uncomfortable.
Image courtesy Wendy Gould
Clear + Brilliant Downtime

The actual laser process takes 15 to 20 minutes, and then you're all done. It wasn't until about five minutes afterward, when my practitioner removed the cooling fan, that I felt the heat set in. I'd describe the sensation as a severe sunburn. It's not pleasant, but it's not unmanageable.
One thing I'd like to emphasize is that I was very, very (noticeably, laughably) red in the hours that followed. Many reports I read said that you could go back to into the office right away, but in my experience that wouldn't have worked. I'm lucky enough to work from home, so I didn't have to worry about others wondering why I looked like a tomato... that said, if you decide to get Clear + Brilliant, I'd recommend either scheduling your appointment after work, taking the day off, or going on a plan-free weekend day.
My skin felt like fine sandpaper the night-of and for the following three days. This sandpaper feeling is caused by the old skin sitting on top of the surface, and with gentle care and time, it'll get sloughed off to reveal "new" skin underneath.
Pictured: About one hour after my treatment.
Image courtesy Wendy Gould
Post-Treatment Products and Care

It's important to use gentle, emollient, non-active ingredients in the days that follow your Clear + Brilliant treatment. That means pressing pause on retinol, AHAs, and BHAs, and instead dousing yourself in products that are highly moisturizing and improve your skin's barrier. My go-to products were Then I Met You The Cleansing Duo, $68, Missha Meditanical Rose Toner, $24.50, SkinMedica TNS Essential Serum, $281, and Naturopathica Gotu Kola Intense Repair Balm, $58.
I also used Supergoop! Superscreen Daily Moisturizer, $38 every day. On day four when I still had flakes but my skin was calm, I used Wander Beauty's BRB Multipolish, $36, a super gentle physical exfoliant that really helped slough old skin off.
In my experience, slight redness lasted for about 36 hours (remember, though, I'm very fair). However, a little Erborian CC Red Correct, $44 meant I didn't have to cancel my coffee date with a friend the next morning.
Pictured: My skin 24 hours later with red-correcting CC cream.
Image courtesy Wendy Gould


