Photo 13/18
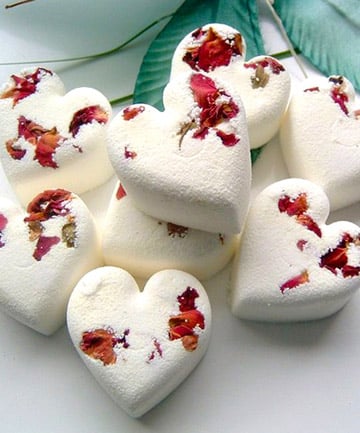
Rose Foaming Bath Bombs
Ingredients:
1 cup citric acid
2 cups baking soda
1 cup sea salt or Epsom salt
6 drops essential oil of your choice
A few spritzes of witch hazel
Food coloring
Directions:
1. Add 1 cup of citric acid to every 2 cups of baking soda (bicarbonate soda) in a kitchen mixing bowl. Mix the two very thoroughly. This is the fizzing part of your bath bomb.
2. Add 1 cup of sea salt or 1 cup of Epsom salts to the citric acid and baking soda mix. Use only fine grain salts to make forming the bath bomb easier. Mix thoroughly.
3. Put dried rose petals or other dried flower petals into the mix to give the bomb a little color. Alternately, add two drops of food coloring to add an even color. Mix completely ensure even distribution.
4. Place six drops of your choice of essential oils into the dry mix and immediately stir together with a wooden spoon. The type and smell of the essential oil is up to you but lavender, rose and mint are popular.
5. Spray witch hazel from a spritz bottle onto the mixture with your left hand. Stir the mixture up with a spoon in your right hand. The witch hazel is the glue that holds the bath bomb together. Experiment to get just the right amount. It should be enough to stick but not enough to make the mixture fizz.
6. Scoop the bath bomb mixture into molds.
7. Allow the bath bombs to air dry for five minutes before taking them out of the mold. Package in decorative containers and bags.
Recipe and Image via thetranquilityladies.blogspot.com
Photo 14/18
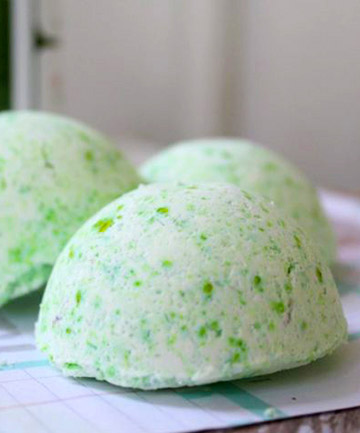
Eucalyptus Bath Bombs
Ingredients:
1 cup of citric acid crystals
1 1/4 cup of corn starch
2 cups of baking soda
1/2 cup of basic Epsom salts
spray bottle with water
food coloring
7-10 drops of eucalyptus essential oil
Directions:
1. In a mixing bowl mix your dry ingredients. This includes the citric acid, corn starch, baking soda, and Epsom salt. Mix well.
2. Add a few drops of green food coloring or coloring of your choice. This is optional and you are free to leave them plain white if you wish. Mix well.
3. Now add your 7-10 drops of eucalyptus oil. You will notice some slight fizzing which is normal. Mix quickly.
4. To create the paste, you will now spray in a few sprays of water. In all you will add about two teaspoons at most. Start off slow and small, spraying and mixing until the mixture starts to clump.
5. When the mixture can be molded in your hands, press it into your ice cube trays or your bath bomb mold. Pack it in well.
6. Turn the mold over and let the bomb come out. Allow it to dry for 24 hours.
Recipe and Image via premeditatedleftovers.com
Photo 15/18
Toy Surprise Inside Golden Egg Bath Bomb

Ingredients:
1 cup baking soda
1/2 cup citric acid
1/2 cup cornstarch
1/4 cup epsom salts
2 Tbsp fractionated coconut oil (or almond oil)
1/4 tsp kid-safe essential oil*
1 Tbsp water
purple gel food coloring
large plastic egg molds/candy holders
small toys that easily fit inside the eggs
1-2 cans of Wilton edible Gold Color Spray
1/4-1/2 tsp gold cosmetic glitter (very fine glitter)
Directions:
1. Mix together the dry ingredients for bath bombs, then add the oil, essential oil and water. Take care to whisk quickly as you add the water so it can blend in before causing much reaction.
2. Add the purple gel food coloring. Stir in well, and repeat until mixture is a medium to deep purple. It doesn't have to be too dark, but helps make the gold over it look more realistic.
3. Fill each side of a plastic egg candy holder with the bath bomb mixture, then insert a toy on larger side of egg... Press down around the toy and opposite side to ensure the mold is well packed, then add more. Press down, once sides are full add an extra scoop on each side and press firmly together. Set the bath bomb filled molds aside to set for about 1/2 an hour, then remove to dry out for about another hour before painting (longer is fine).
4. Once the purple egg bath bombs are dry, take a can of Wilton edible gold paint shake well and mist on the bath bombs. It will take a number of coats to fully cover the egg with gold paint. While the spray is still wet sprinkle on some gold cosmetic glitter to add more glisten to the Golden Egg bath bombs.
5. The Toy Surprise Inside Golden Egg Bath Bombs should be left to dry overnight before sealing in airtight container or using.
Recipe and Image via blommi.com
Photo 16/18
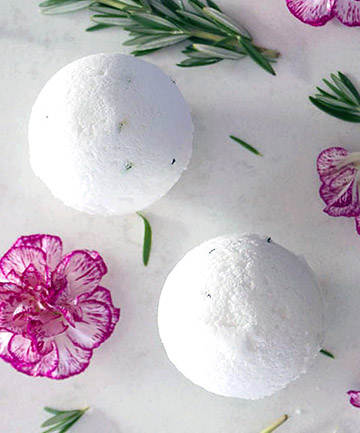
Muscle Relief Bath Bomb Recipe
Ingredients:
1/2 cup baking soda
1/3 cup Epsom salts
2 T cream of tartar
2 T coconut oil, melted
1 t peppermint oil
1/2 t fresh rosemary, chopped (optional)
Directions:
1. Start by combining dry ingredients and chopped rosemary in a medium glass bowl. Whisk to blend. Whisk in coconut oil and peppermint oil.
2. Using a spray bottle, spritz water to moisten mixture as you stir. The mixture should be crumbly, but hold when squeezed.
3. Use a spoon to scoop mixture into bomb molds or ice cube trays. Press firmly. If using a bomb mold, overfill each side slightly before putting together. Allow to set at least 4 hours in a cool, dry area.
4. Loosen bombs from molds and place in warm bath water to dissolve.
Recipe and Image via blog.paleohacks.com
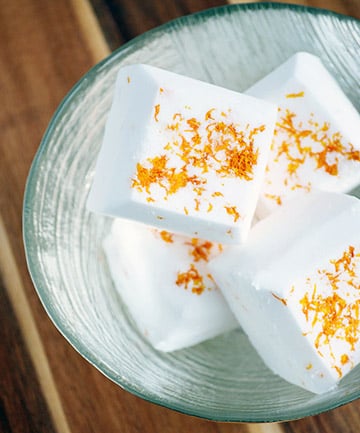
Photo 17/18
Meyer Lemon Bath Fizzies
Ingredients:
10 drops lemon essential oil
Zest from 1 Meyer lemon
1/2 cup citric acid
1 cup baking soda
Witch hazel in a spray bottle
Directions:
1. Mix the baking soda and citric acid together really well, I even tossed it into the food processor to make sure they were fully combined. That powdered the citric acid, giving the mixture a smooth texture.
2. Add in a few drops of the lemon essential oil, about half of the zest and then start to lightly spritz everything with the witch hazel. You'll want to do this last step quickly to make sure you're mixing before all of the witch hazel bubbles away (it will have a similar reaction to vinegar and baking soda). I used my hands to mix so I could feel the consistency, you're looking for slightly cool and a pinch damp, just wet enough that you cans squeeze some in your hand and it will hold the shape.
3. Once you hit that point press it into your molds. I used the super easy and nice silicone ice cube tray/mold shown above.
4. Use firm pressure to fill the molds. Let them air dry, in the tray, at room temp until they are solid. You can then easily pop them out and store in an air tight container until ready to enjoy.
Recipe and Image via dearcrissy.com